Garden Planning Made Easy

Wintertime gives us gardeners an opportunity not just to enjoy the delicious winter crops that grow all year round, but also to take a bit of time considering our goals and planning for the next summer growing season. Many newer gardeners struggle with the complexity of planning their garden. How do I know when to grow what? How do I know what to put where? How many plants should I buy? Or should I use seed? How does that work, anyway? It can be overwhelming.
Planning your garden doesn’t have to be complicated or confusing. With a few simple steps and planning done during the cooler season, you can have a productive and healthy garden that is not stressful, but a source of joy.
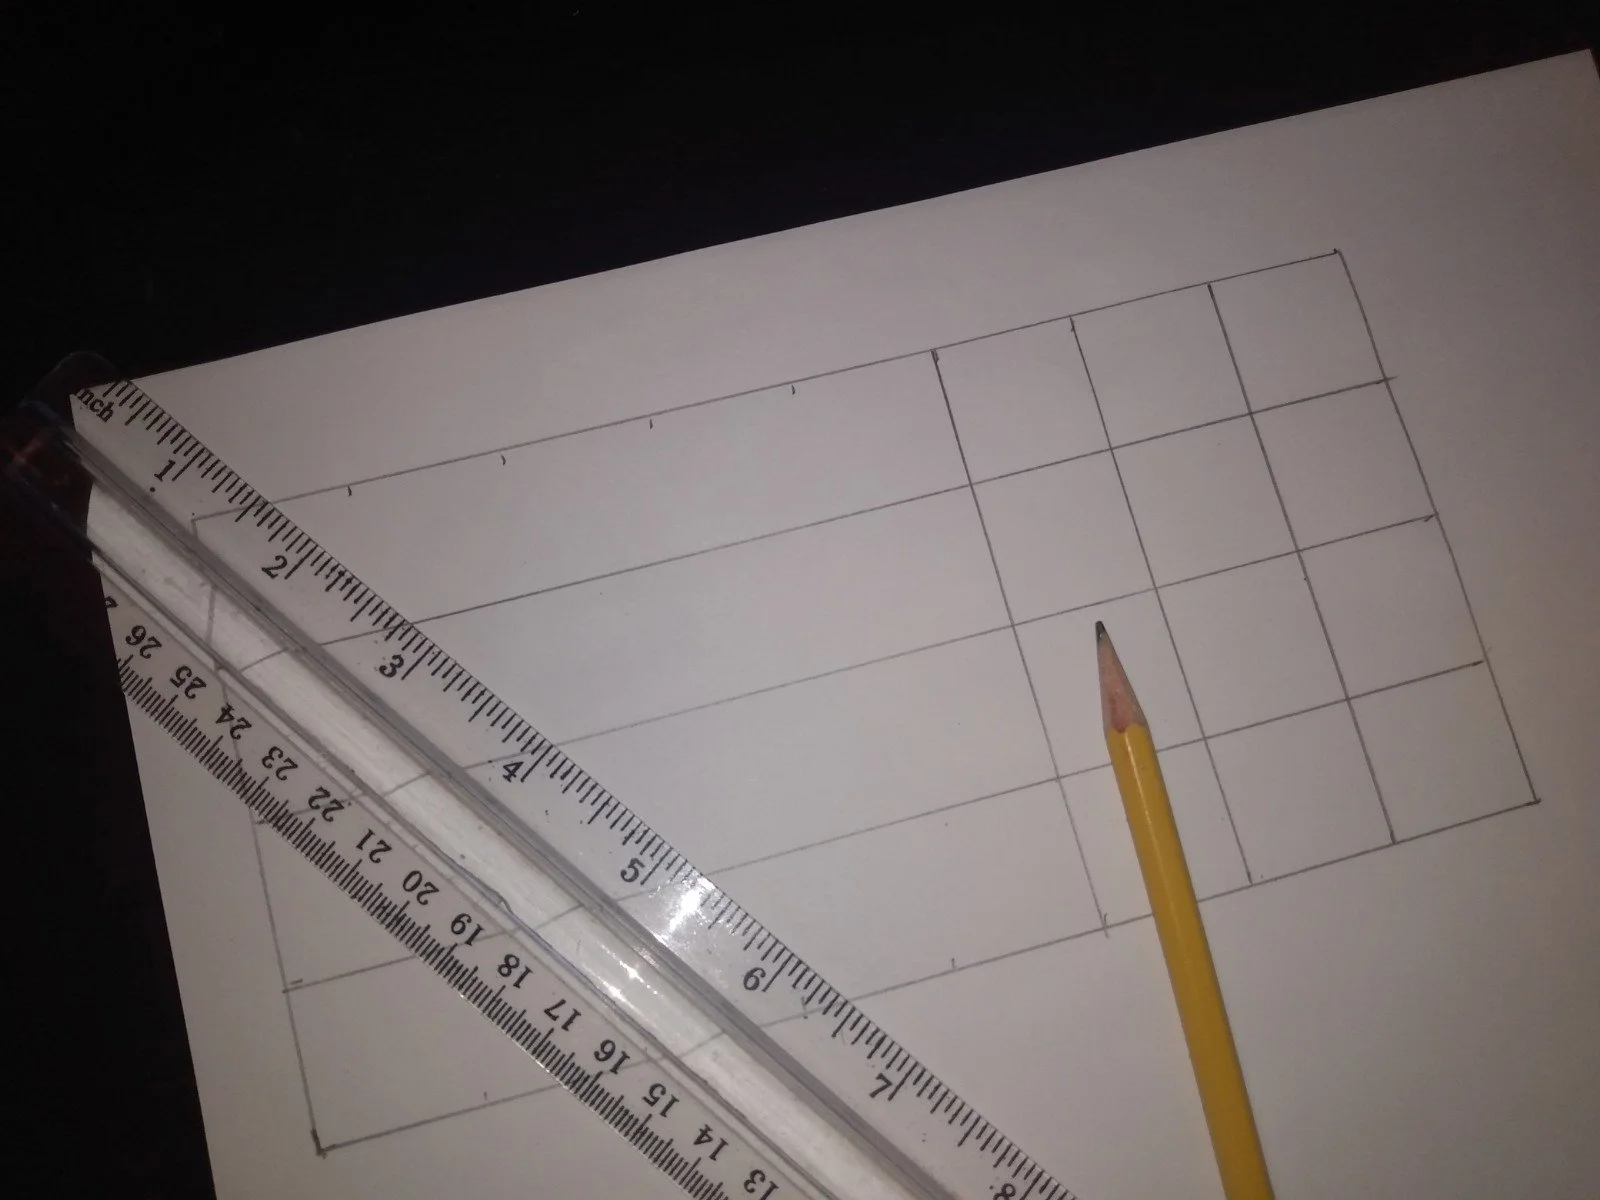

Step 1: Measure your space and draw it like a grid from above. This garden is 4ft by 8ft. I am using 1 inch to equal 1 foot, to make it easy. I use pencil, and mark north and an area on the western side of the bed where there is some afternoon shade cast from a nearby tree. After you have your garden bed drawn, make some copies of this if possible, so you can erase and start over if (when) you make some mistakes. This is also helpful to have on hand when you’re planning for future seasons.
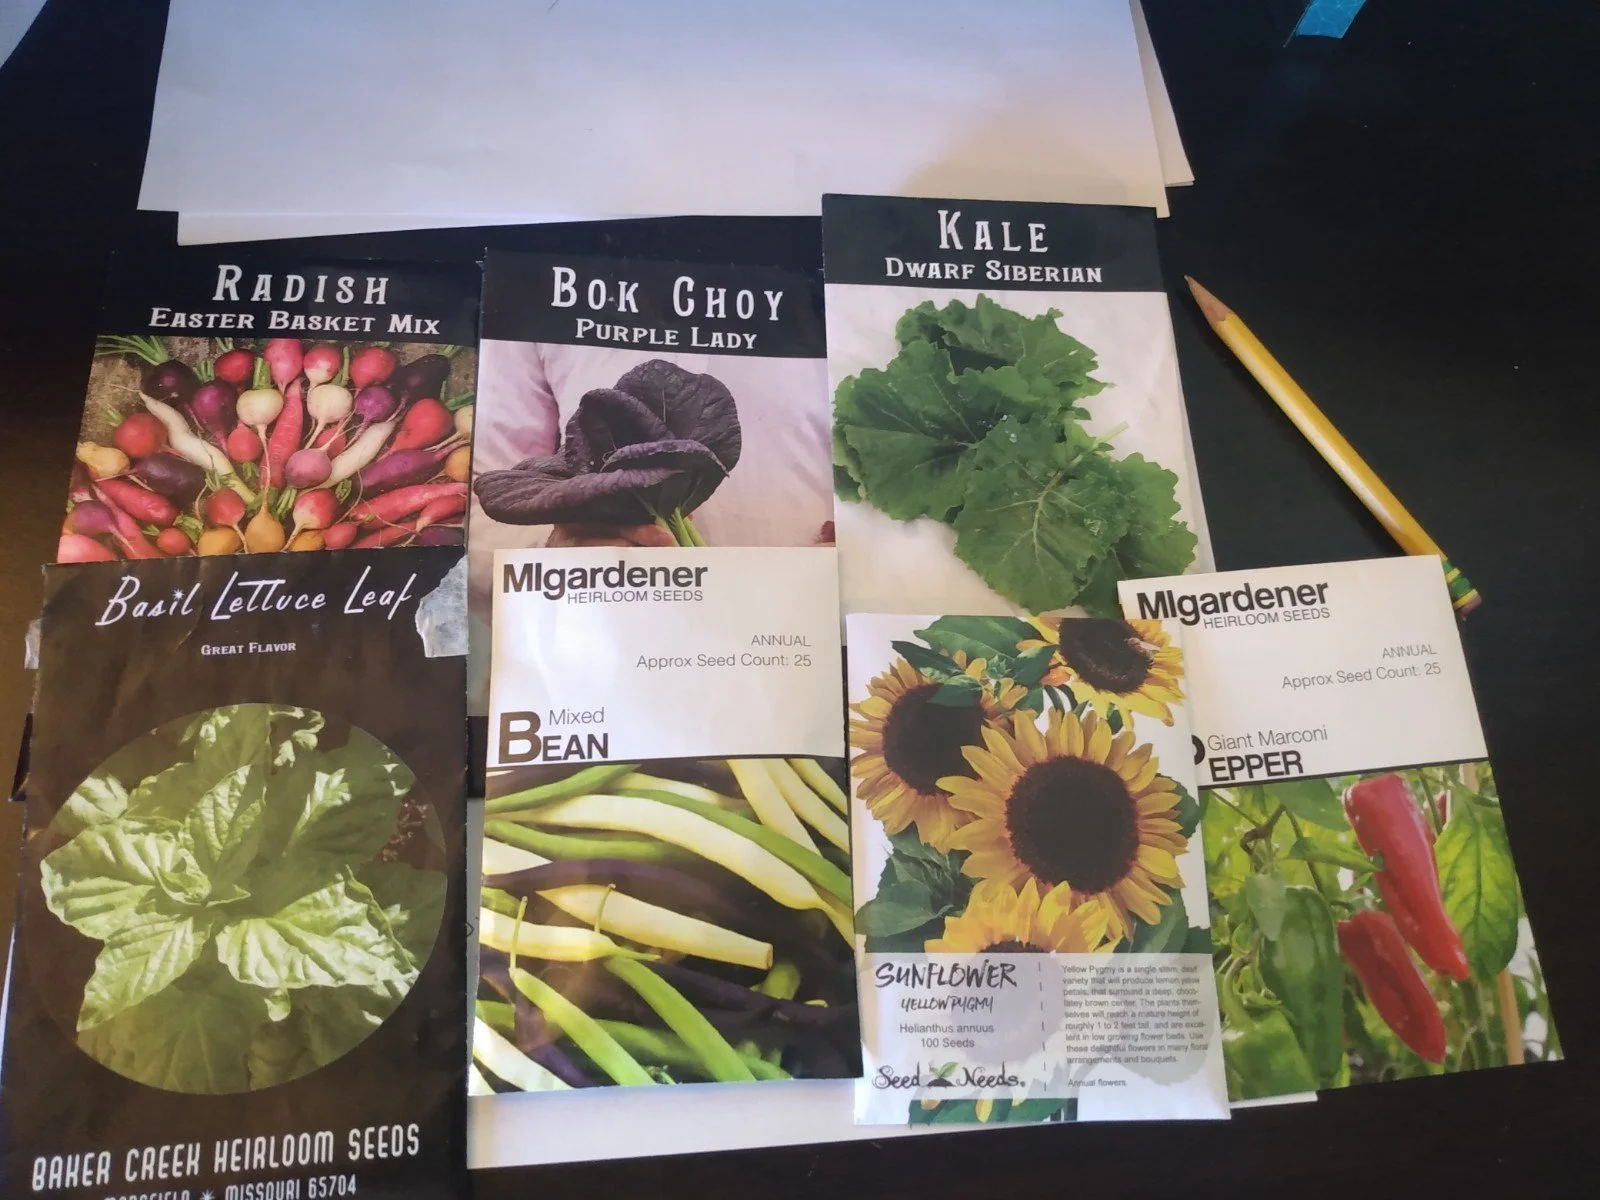
Step 2: Choose what crops you want to grow in this garden. I want to grow summer greens and peppers in this bed. You can see that I have some other plants as well, and they are chosen to increase production and provide support for the greens and peppers, but more on that later.
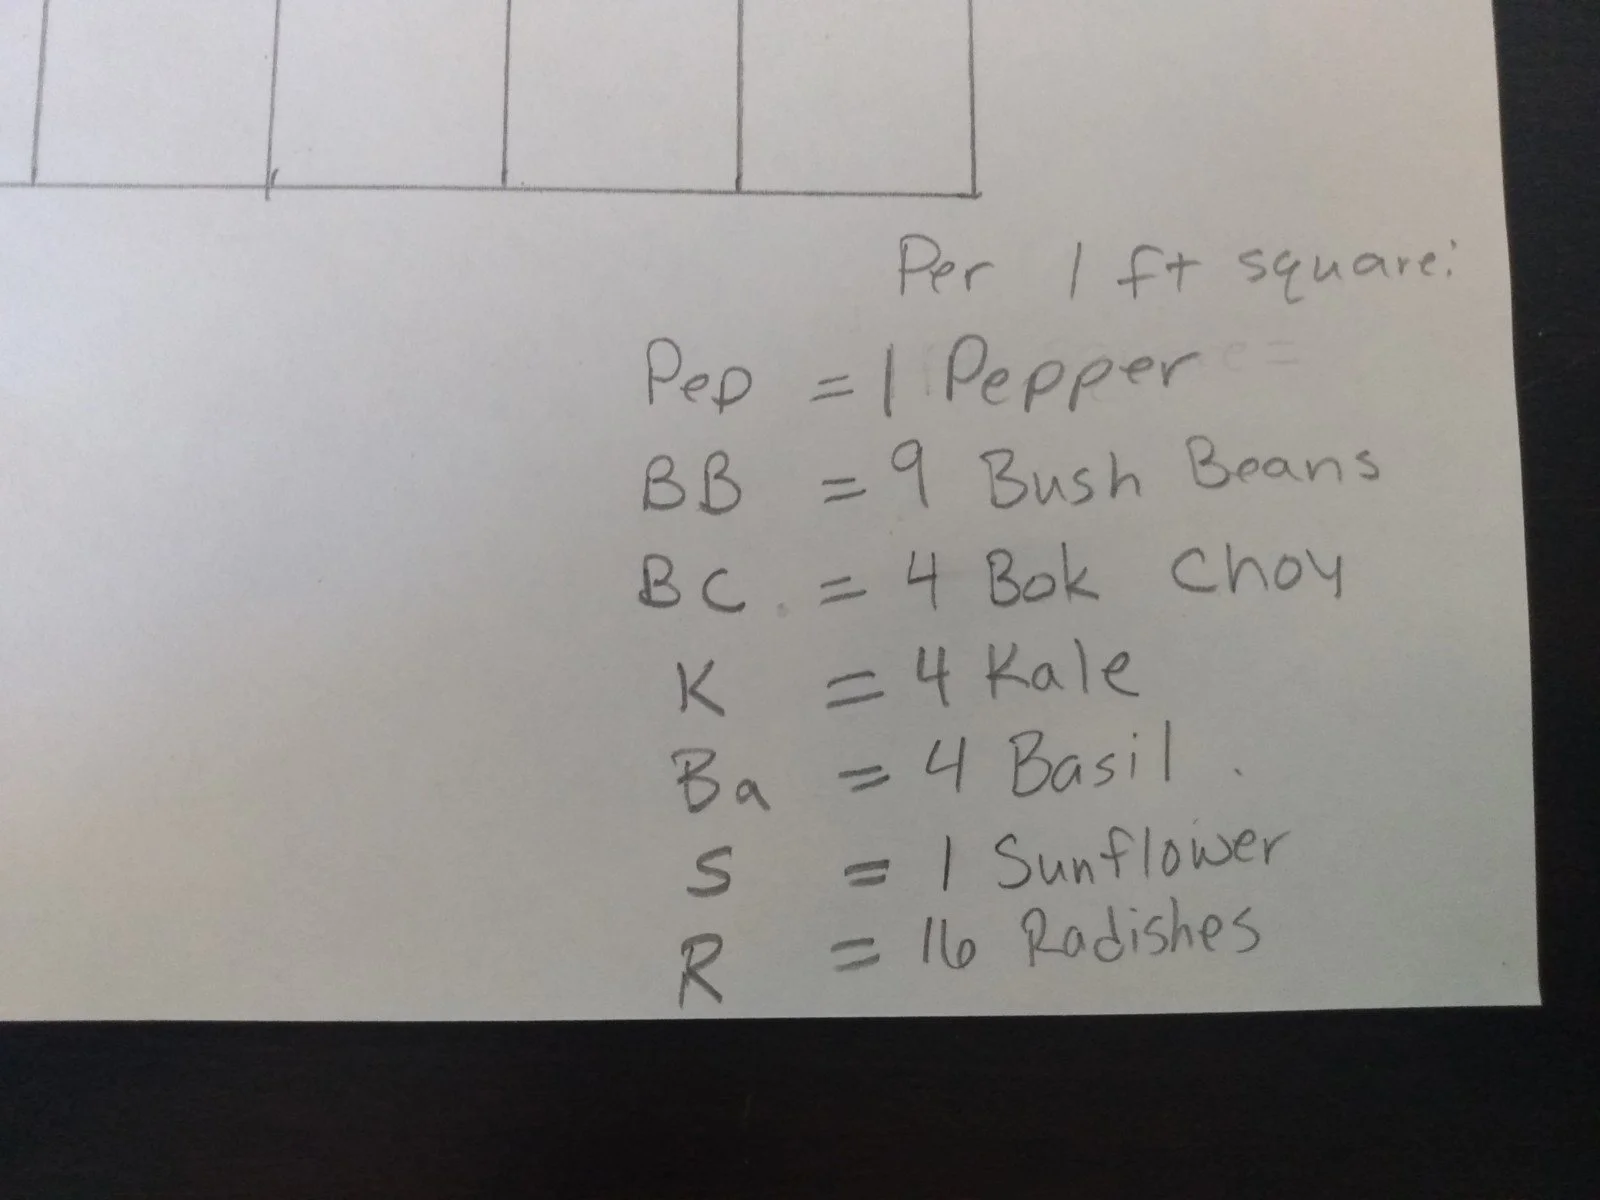
Step 3: Figure out spacing. You can use the information on the back of the seed packet to figure out spacing, or you can look each crop up online, just search “pepper plant square foot spacing” or whatever plant you’re looking for. I like to write this down on my planning sheet, so it’s easy to refer to as I’m doing my planning.
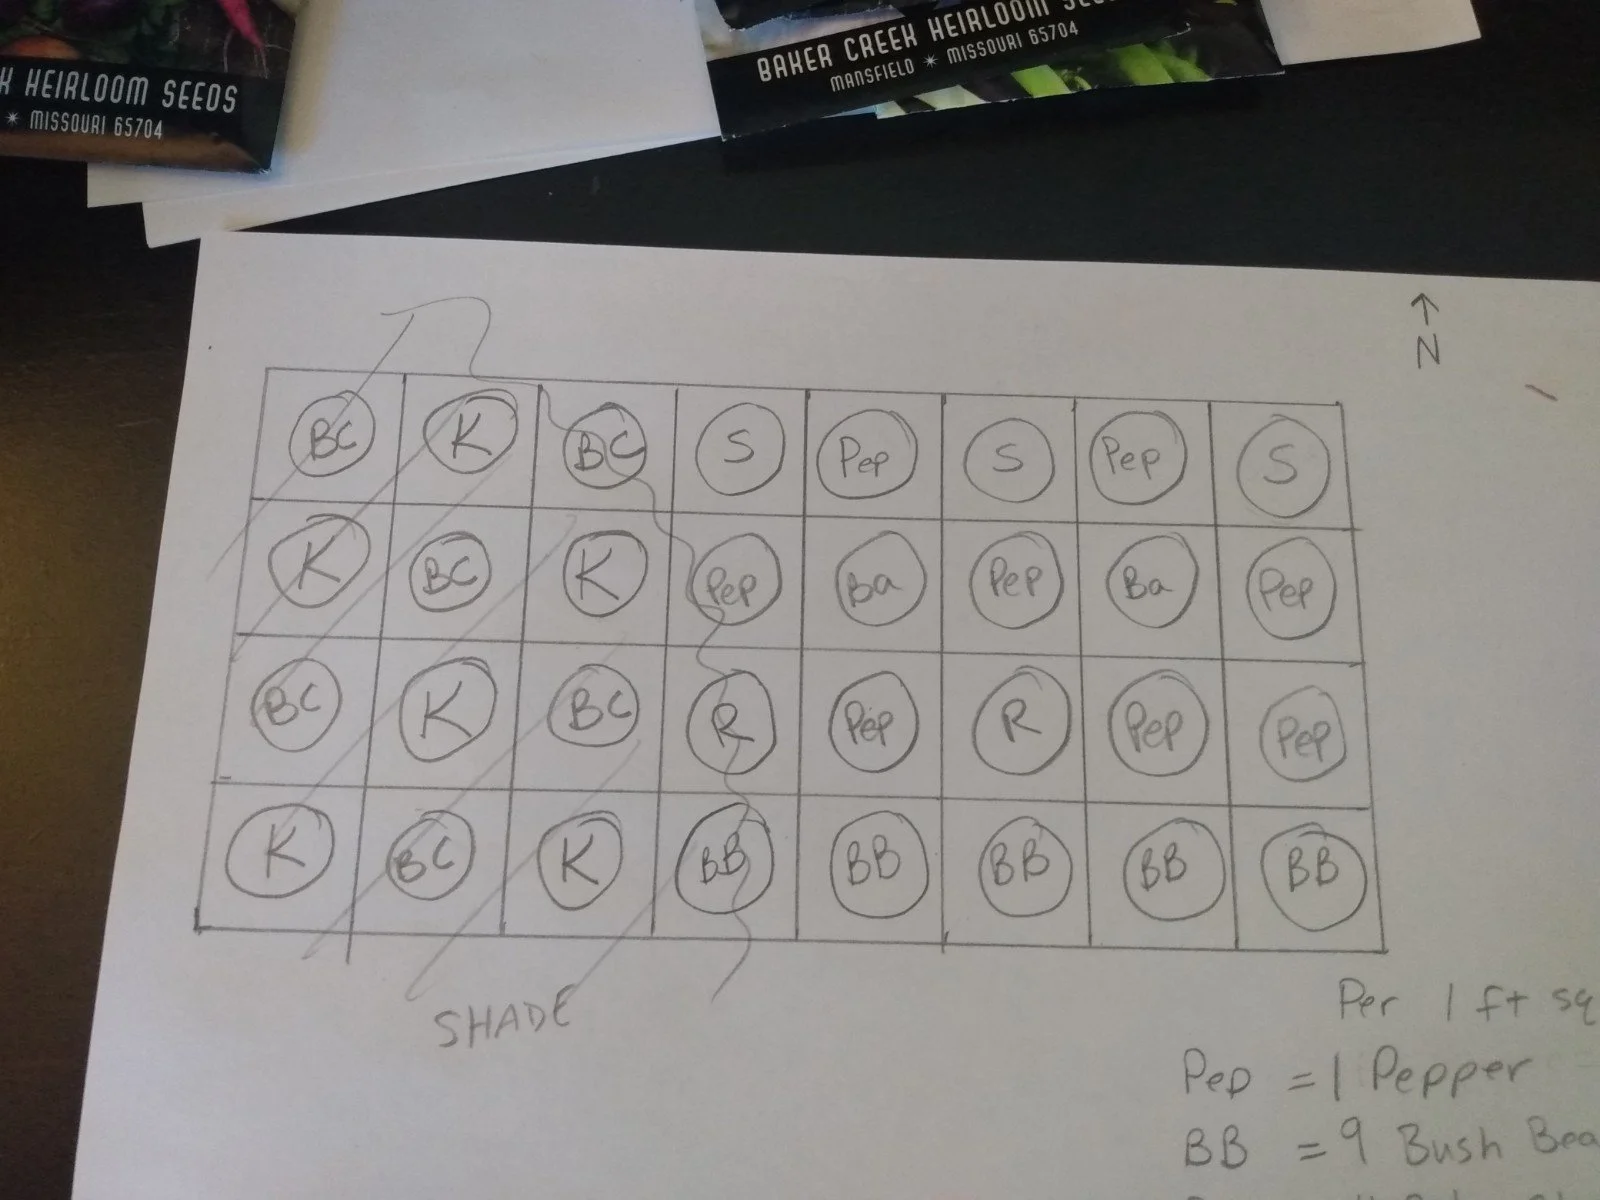
Step 4: Start placing your plants on paper. This is the fun part. I chose a purple bok choy and a green kale because I love to put my greens in a checkerboard pattern, so I made sure to fill in the shady spot with those contrasting colors. Notice that I put the leafy greens in the shade, because that’s where they grow best. On the sunny side of the bed I placed my peppers first, then added in sunflowers, basil, radishes, and bush beans around them. Each of these serves a purpose in providing pest control, pollinator attraction, or increasing fertility of the soil nearby.
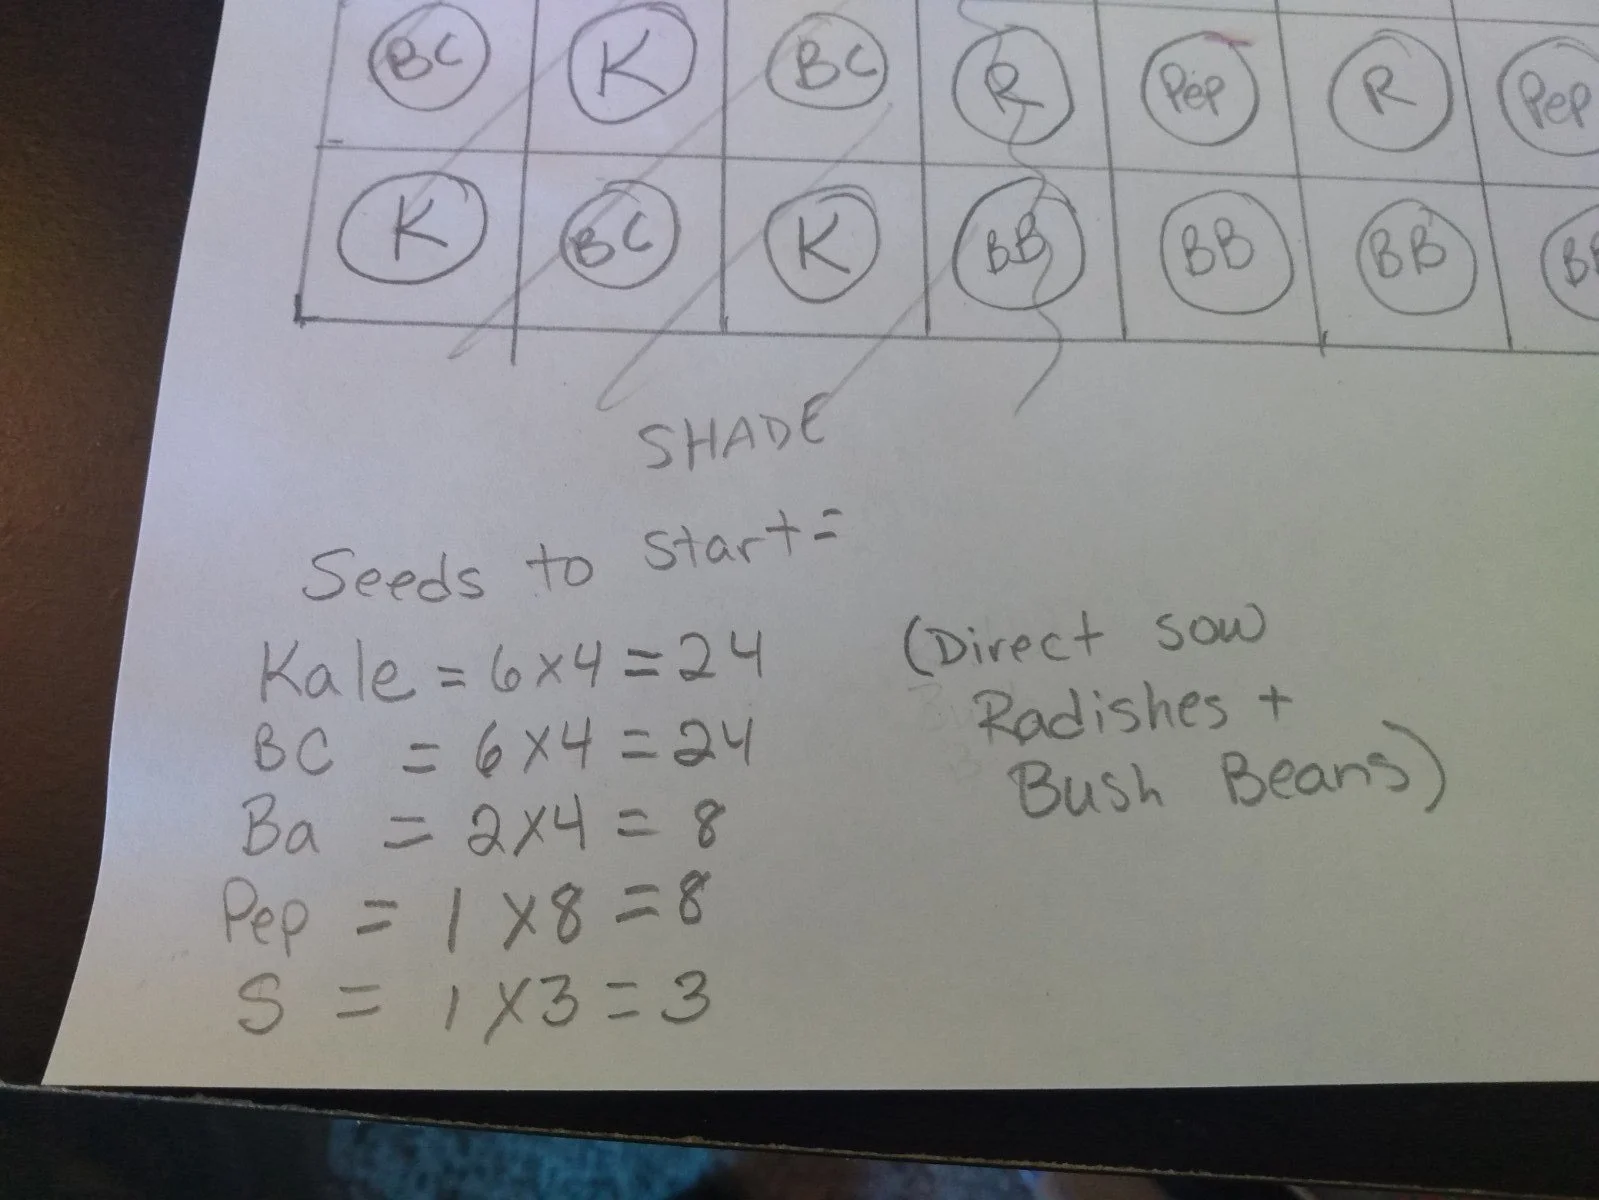
Step 5: Calculate how many plants you need. Using the square foot spacing, I know I want to grow 6 square feet of kale, and they are planted 4 per square foot. That means I will need 24 kale plants when it’s time to plant. I can take this info and purchase my plants, or I can move on to the next step, and grow my own from seed.

Step 6: Figure out when seeds need to be started. This info can be found on your seed packet, how many weeks before frost dates you need to start seeds. It’s important to know when your first and last frost dates are, search by your zip code to get that info. Here in the Wilmington, NC area it’s late March or early April.
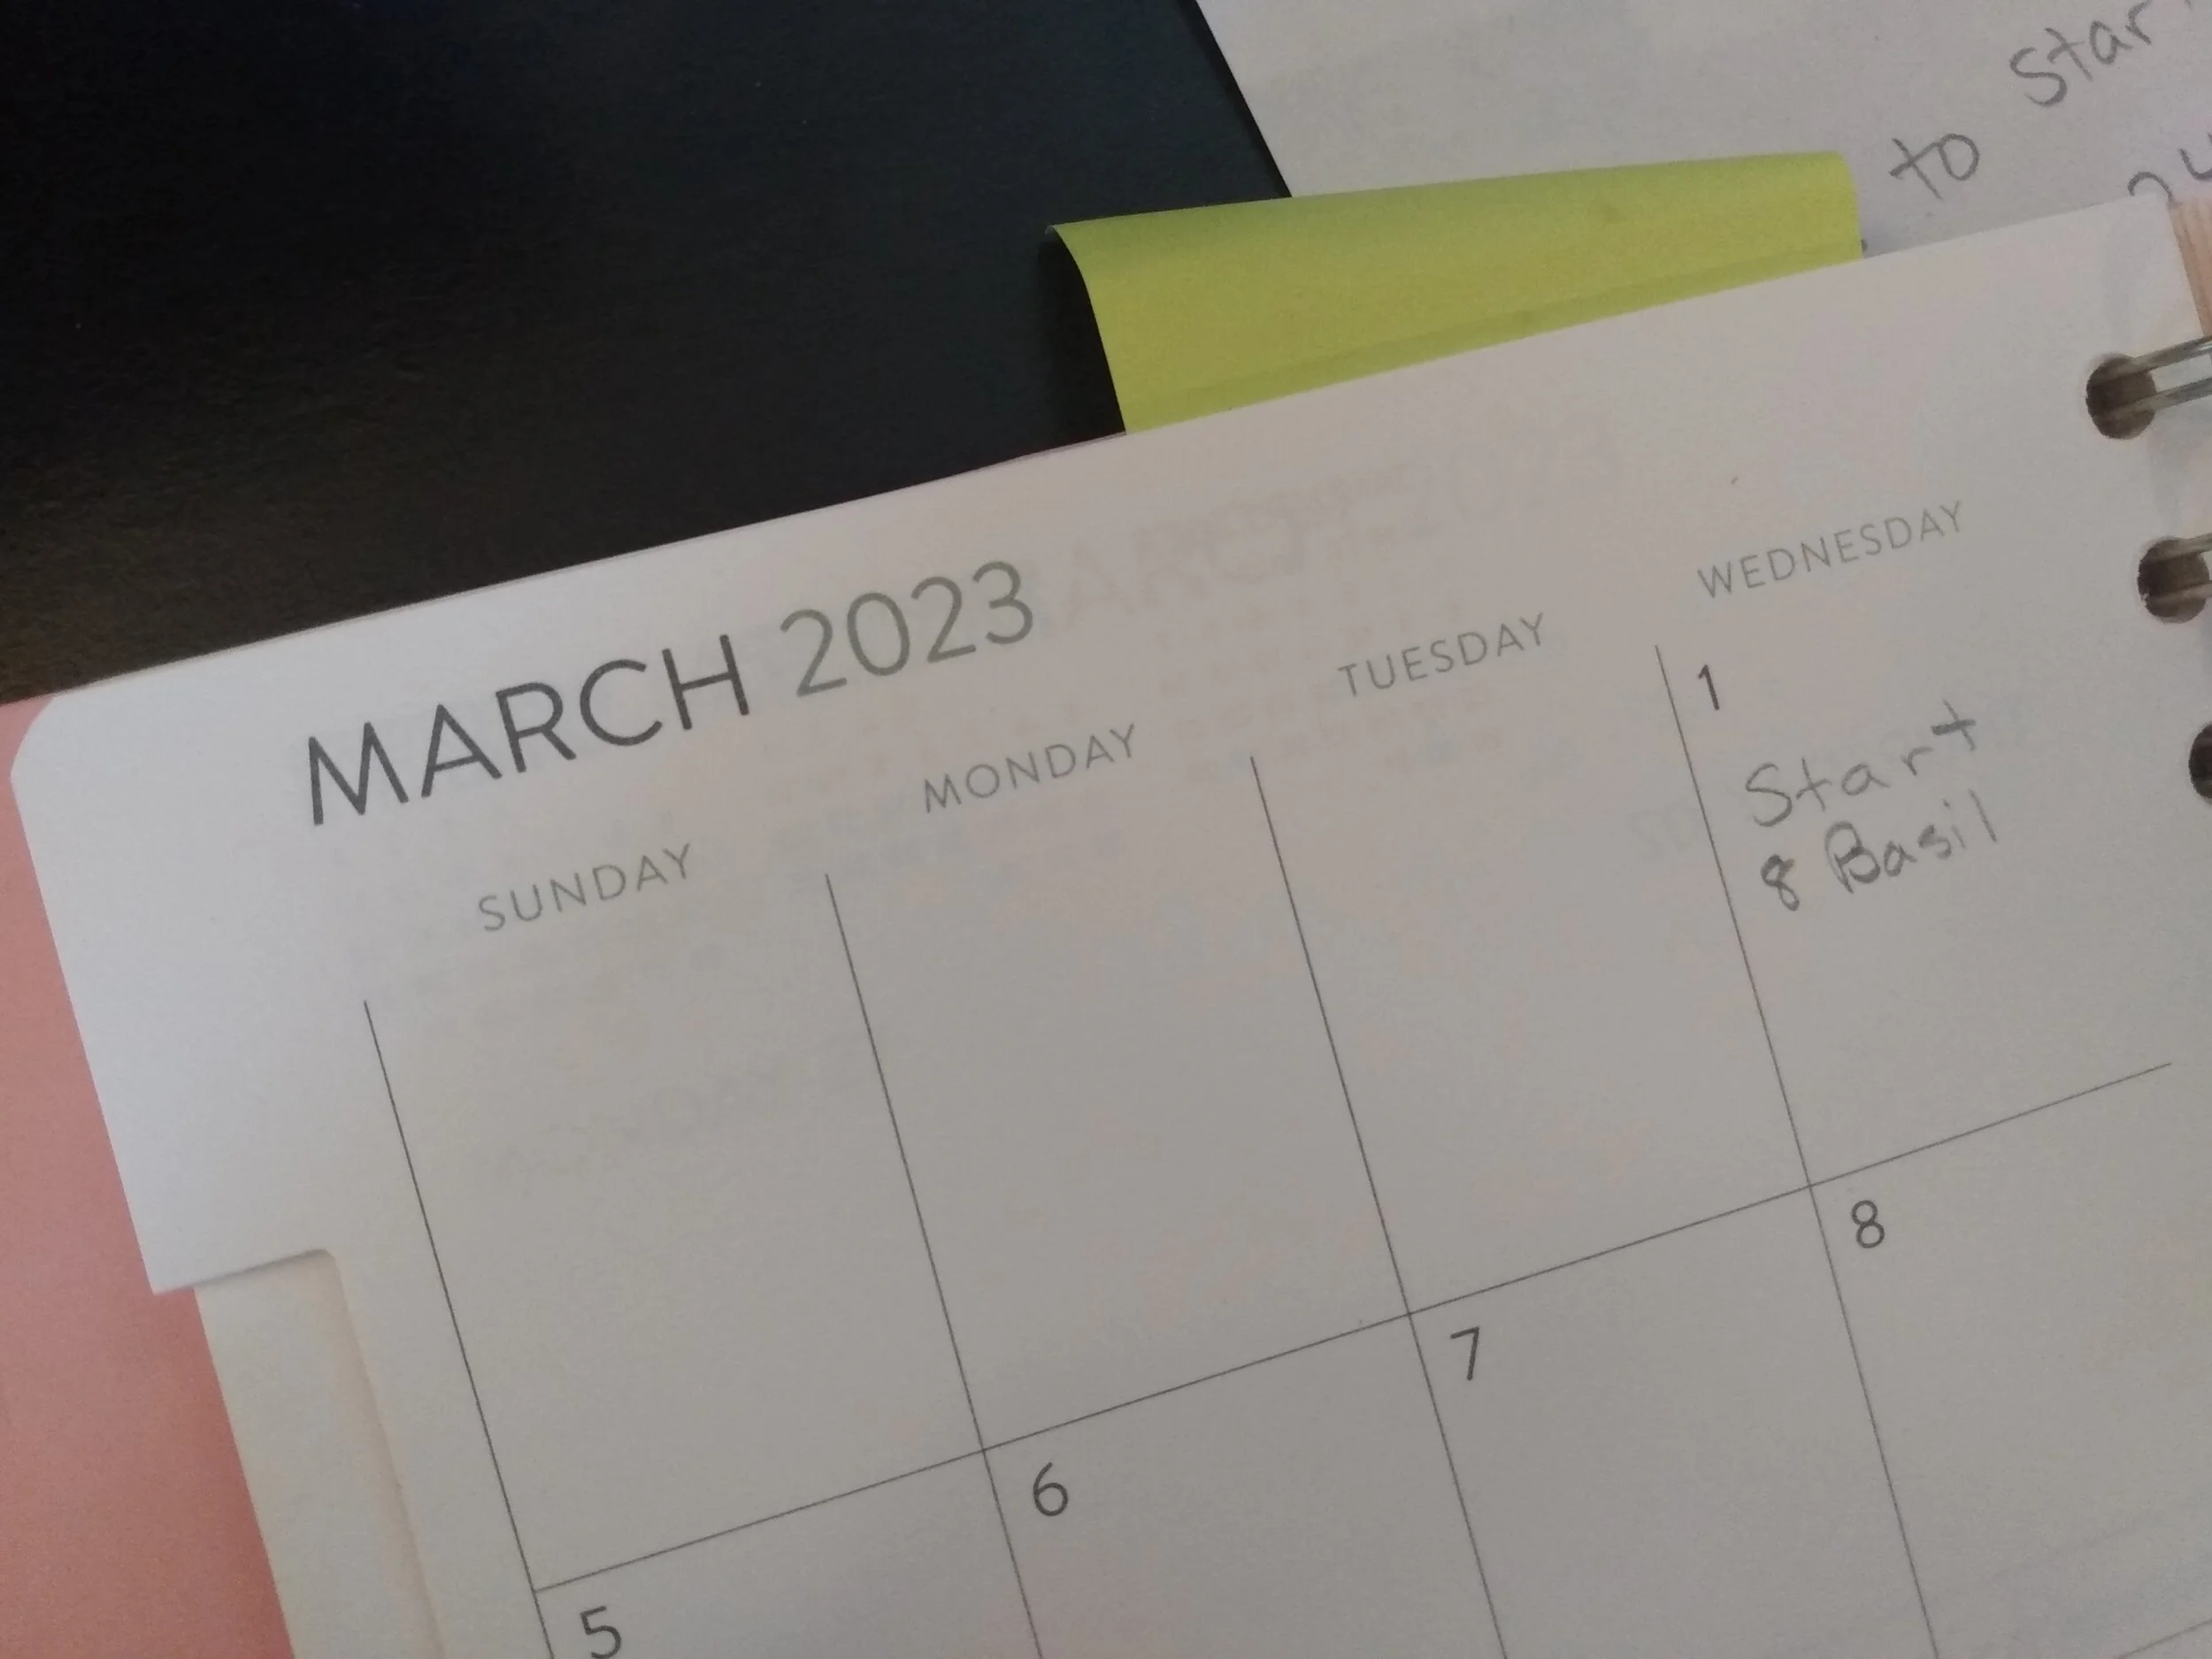
Step 7: Put the dates into your garden planner so you don’t miss your planting window. This planner is an important part of your gardening life, and I recommend getting a new one every year. It will also be a great reference to look back, especially if you keep it updated with the dates things germinated, grew, and were placed out each year.

These seven steps can be used in any season, with any crops, in any size garden. It doesn’t matter if you’re planting in a few pots on your patio or a giant homestead, the basic planning steps are the same.
Planning your garden doesn’t have to be stressful, it can be one of the highlights of the growing year, and keep you from the “what do I do now” overwhelm when it all seems to need to happen at once. If you’re looking to put in a garden here in the Wilmington, NC area and need a little help, Blue Basil Garden Coaching offers private in-garden coaching sessions and planting plans, where an experienced coach will help you through these steps and you will learn exactly how to implement this technique in your own space. To see our coaching options, follow the link below.